This FAQ explains what the “Stream Monitor” is, how to set it up and how to implement it in your scheduling with scripts.
(all screenshots were taken in mAirList version 7.3.4)
1. What Is The "Stream Monitor"?
The “Stream Monitor” is a module only activated for clients using the "Advanced Server" or “Professional” edition of mAirList for their playout instance.
It lets you pick up incoming Shoutcast / Icecast streams immediately when they become available, re-broadcasting them instantly.
This super helpful tool is designed as a convenient way to incorporate live streaming fully automatically (i.e. from a home DJ, an outside broadcasting event or a night show from another station) into a 24/7 automated mAirList system.
2. How The Stream Monitor Works
The Stream Monitor will “listen” in the background to Icecast or Shoutcast streams you’ve set up in the configuration (instructions in chapter 4).
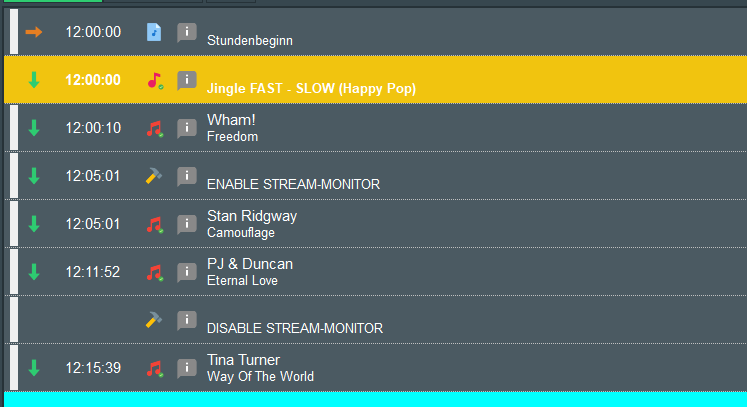
Every time the Stream Monitor detects an active stream it can send the stream to a configured audio channel of your mAirList playout and (or) can start actions like start/stop playlist, load playlists etc.
A very clever extra function is the “High Priority Input” that can automatically mute the recent playout of your playlist (PL) or any other audio that is sent to the encoder by forwarding the incoming stream right to the encoder as a “High Priority Input”.
The PL (or sent audio) will still “play” muted in the background and is available as an emergency fallback if the stream will be unexpectedly interrupted or the planned DJ is a no-show.
(Please read instructions for setting this up in chapter 5ff)
3. Advantages Over Stream Elements In Playlists
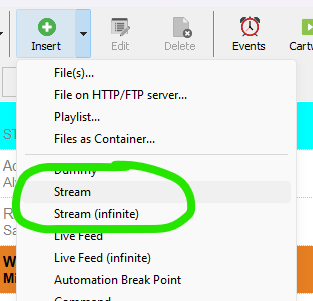
Sure, it is also possible in mAirList to incorporate streams for a specific schedule as elements in playlists.
But often live shows or events can’t be well calculated or timed forehand.
So when you’re using the playlist elements “Stream” or "Stream (unlimited) in a playlist for such events/shows there can be some drawbacks:
- you often need the exact duration of a stream to schedule it timed correctly to prevent silence on air
- if a stream disconnects due to technically problems, the playlist element will not try to pick it up again, resulting in silence on your station
- Top Of The Hour’s (TOTH) playlist changes will interrupt the stream even if the show/event isn’t finished.
- early finished shows / events will left your playlist with silence until the next element is played
This is, where the Stream Monitor shines and make things easier with its advantages:
- it doesn’t need a schedule (though it’s possible to schedule its activity by using a script, instructions see chapter 6ff)
- it will play the stream immediately when it becomes available
- it will re-connect as soon as possible after the stream was interrupted (depending on your settings)
- it can execute actions on a recognized connection / disconnection
And if you are using the “High Priority Input” audio routing option (for instructions visit chapter 5) the stream will fade out the playlist audio (and any other audio sent to the encoder) and only play the incoming stream while the standard PL can play in the background.as a fallback solution or to prevent silence, kicking in when there is no stream available.
4. General Setting Up the Stream Monitor
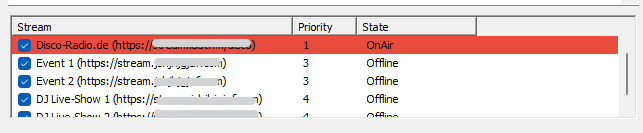
4.1 Register The Streams
Open the configuration panel and select the “Stream Monitor” setting in the left option tree.
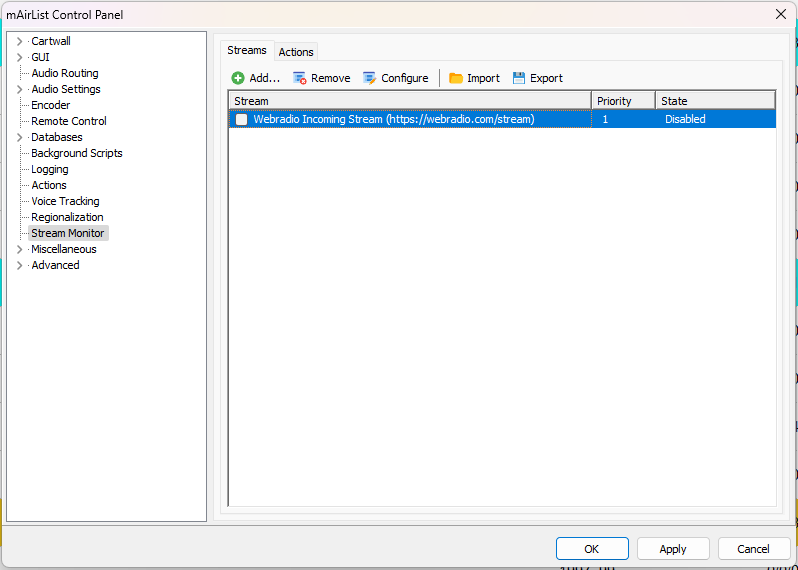
You can enter any number of stream addresses, which mAirList will monitor periodically, every few seconds.
![]() Important:
Important:
mAirList will remember the last enabled streams that were saved in the configuration window. If you’ve just disabled a stream in the playout window by removing the checkmark in the Stream Monitor’s screen object only
and closed the application, mAirList will restart with the settings saved in the configuration.
For safety reasons I personally prefer to use the script shown in chapter 6.1.1 to disable the Stream Monitor as a startup action.
–

Streams can have priority over another so only the stream with the highest priority will be picked up and go on air.
![]() Important:
Important:
- the lowest priority value (=number) reflects the highest priority! (i.e. Priority 1 will fade out a stream with Prio 2)
- two streams with equal priorities will play simultaneously!
4.2 Setting Up The Audio Routing
As soon as a stream becomes available, mAirList will play it on a defined sound card.
You can define the soundcard in the configuration panel for your audio routing in the “playback” tab

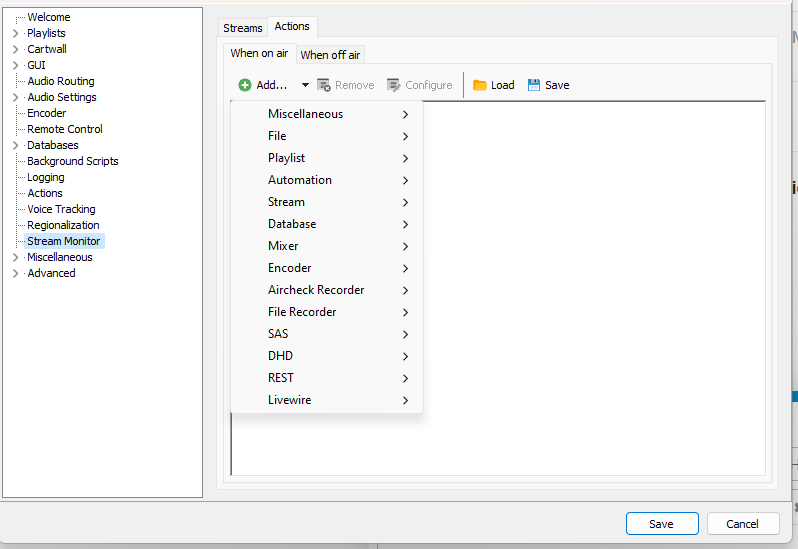
4.3 Setting Up Actions
In the “Actions” tab you can set up the actions getting executed when a stream connects or disconnects.

![]() Important note 1:
Important note 1:
This actions will be executed whenever ANY of your set streams connects or disconnects. You can’t specify actions for one stream independently!
![]() Important note 2:
Important note 2:
It is NOT needed to set up start/stop actions for the playlist when you are using the “High Priority Input”. The stream delivered by the Stream Monitor will not be interrupted by a new loaded playlist at the “Top Of The Hour” (TOTH) and will play through as long as the stream is active or the Stream Monitor is enabled.
–
4.4 Stream Server Suggestions For Live Shows Or External DJs
For your own DJs or live shows you typically would use a “private” streaming server that will relay the incoming stream(s) to mAirList.
The DJ connects to that private server, mAirList picks up the stream, and rebroadcasts it to the public server.
Outside the hours of this live streaming, the “private” stream should be offline.
We recommend using Icecast for that private stream – we found that Shoutcast does not work so well because it may buffer old portions of audio (from the previous broadcast) and send that to the listener (the Stream Monitor in this case!) first when the new broadcast starts.
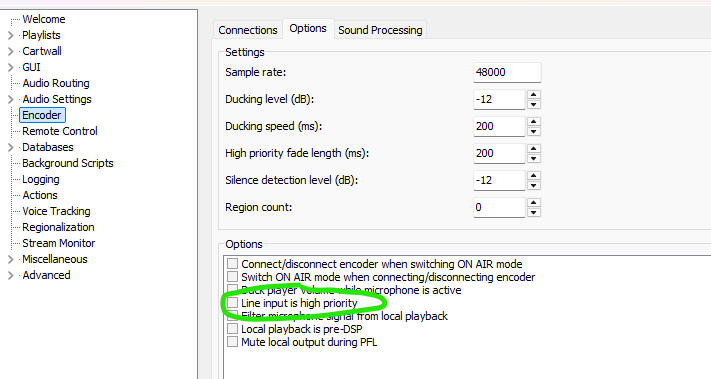
5. Setting up the "Stream Monitor" with High Priority Input
First step: “Tell” mAirList to send the audio signal from the Stream Monitor into the High Priority Input of the Encoder in the audio settings:

In the encoder settings check two more things:
- adjust the fade-in / fade-out duration to your needs

- Add an amplification here to level the incoming stream if needed

6. Turn Stream Monitor On/Off Automatically With A Script
For many stations it might be a good advice to disable the Stream Monitor as long as no show or event knocks at the door and activate it automatically just in time before the show/event starts.
Some stations on the other hand might be interested to enable the Stream Monitor to incorporate a “master stream” i.e. only at night through a hour template with all its advantages (local PL as fallback, re-connect any temporarily lost stream immediately).
You can do all of this with mAirList automatically in multiple ways as a playlist object, a timed event or within an hour template by using the attached scripts.
Here’s how:
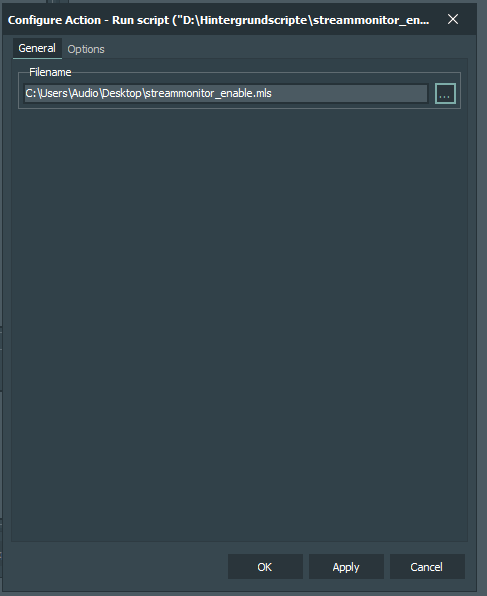
6.1.1 Download Two Scripts
First download these two scripts (click it), one FULLY activates, the other FULLY deactivates the Stream Monitor.
streammonitor_disable.mls (150 Bytes)
streammonitor_enable.mls (149 Bytes)
Save both to a folder that mAirList can access without any Windows ![]() restrictions.
restrictions.
6.1.2 Set Up Two Database Elements with this scripts
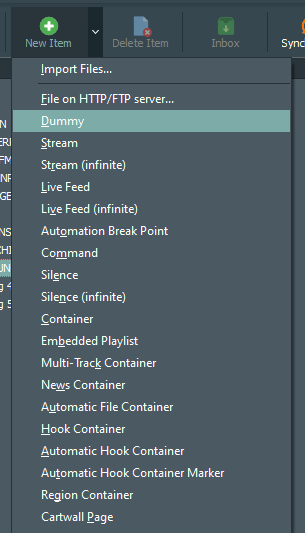
To use the scripts repeatedly in a playlist (or in a hour template), you need to create two elements in the database.
(we are showing one element here as an example, link the second script to the other element the same way)
Add a “dummy” element:
Add an “Action on Start” at the bottom as shown in the screenshot:
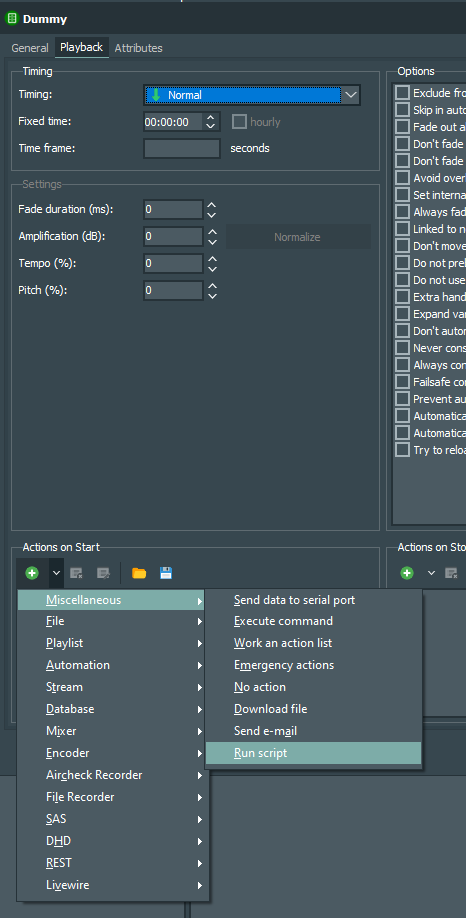
Give it a name so that you/the presenters can easily recognize it in the playlist:
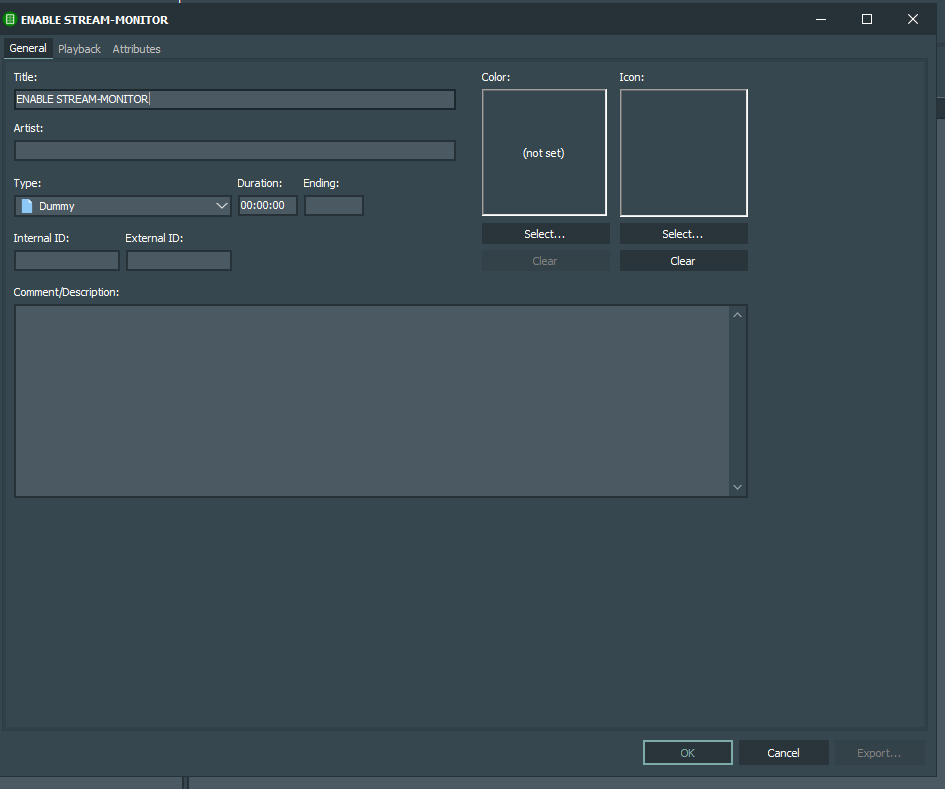
It should look like this now.
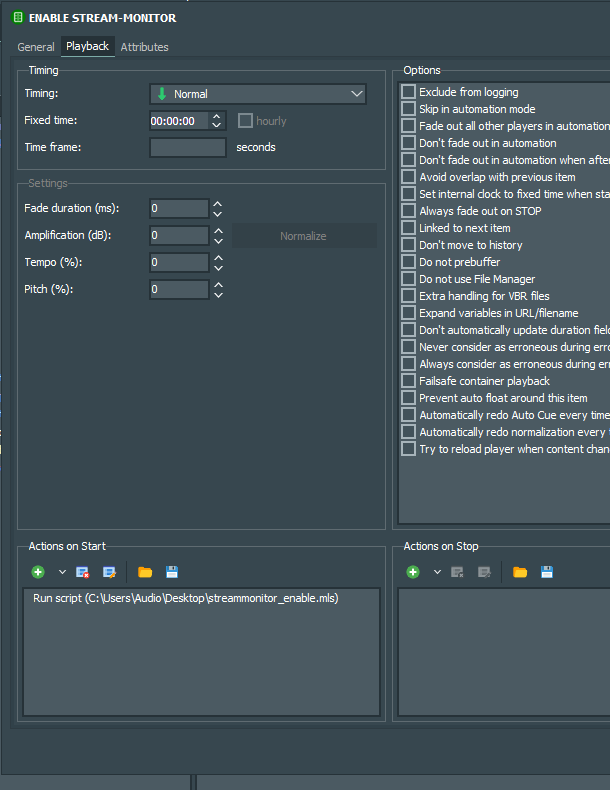
Save it to the database.
![]() You can also use a “command” element (like in the next screenshot) or any other element, for example using a jingle and then use the “Action on Stop” would play the Jingle and then activate the Stream Monitor)*
You can also use a “command” element (like in the next screenshot) or any other element, for example using a jingle and then use the “Action on Stop” would play the Jingle and then activate the Stream Monitor)*
6.2.1. Use The Scripts As An Element In A Playlist
In the playlist you can now insert the elements in the desired location, where they will then execute the script when the element is started.
![]() Please Note: The dummy/command element does only appear in the PL, not in the player, but is still executing the script (!)
Please Note: The dummy/command element does only appear in the PL, not in the player, but is still executing the script (!)
6.2.2. Use The Scripts In An Hour Template
You can also use the elements in hour templates. Set it as “Specific Item” in the hour and enter the ID or simply search for the name of the item.
6.2.3. Run Script As An Event
To enable or disable the stream monitor as an timed event, select the “Run Script” action in the event settings and link to the appropriate file there.