Auto Mix is a function in mAirList that can automatically adjust cue information (markers and envelopes) of subsequent items based on their properties.
The main purpose is to move voice tracks or sweepers into the intro of the subsequent music items (if the ramp is long enough), but more possibilities may become available in the future.
Auto Mix was introduced in mAirList 8.0.
How it works
You must first define one or more Auto Mix Rules (see below). When the Auto Mix function is triggered (manually or automatically), it scans the playlist for two subsequent items that match the criteria specified in the rule.
When two matching items are found, their current cue information (cue markers, envelopes, and padding) is backed up in a “snapshot” so it can be restored later. Then the cue information is adjusted so that it matches the specification in the rule.
For example, a Start Next marker might be added to a voice track so it starts the subsequent music item just in time to finish the voice track before the end of the ramp, and a volume envelope might be applied to the music item to lower the volume during this overlay.
Items that have been adjusted by Auto Mix will be marked with a “magic wand” icon:
![]()
When you adjust the contents of the playlist, insert or delete items, or move items around, and the Auto Mix function is triggered again, it will revise the cue information, and possibly remove the automatically added cue information again. For example, when you have a voice track overlaid on a song with a long intro, and replace the song with a one that doesn’t have an intro at all, Auto Mix will revert everything back to the original cue information (stored in the backup snapshot it made earlier).
Defining Auto Mix rules
Auto Mix rules can be defined in two different places:
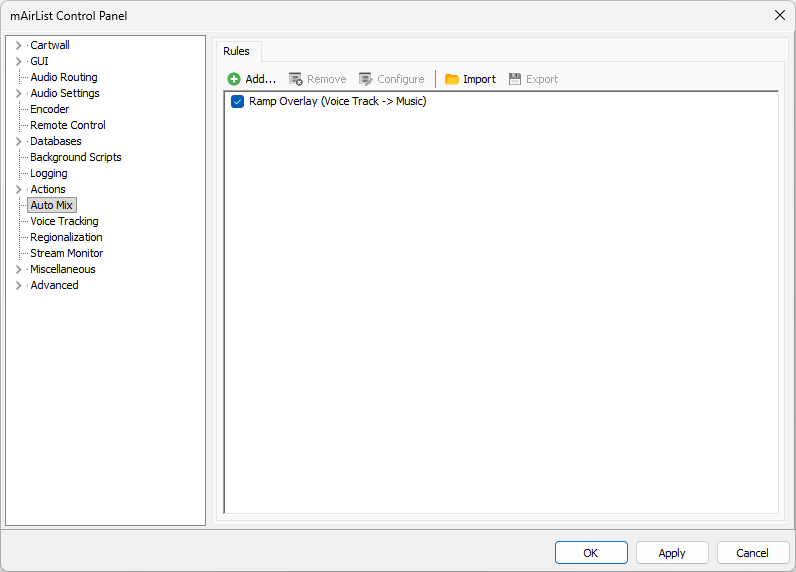
- In the configuration app or Control Panel (Auto Mix page):
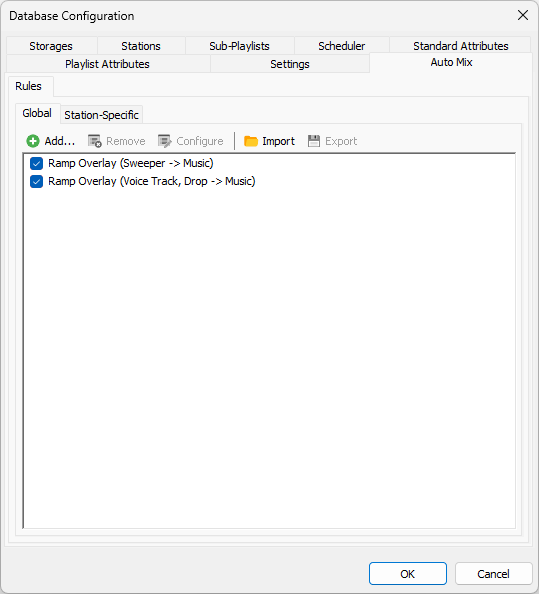
- In the mAirListDB settings (DB app → Administration → Configuration → Auto Mix tab). Here you can define “global” rules that apply to all stations managed in that database, and station-specific rules:
The playout application will merge the locally configured rules, plus the rules defined in all configured databases.
The database app (database playlist editor) will only use the rules defined in the database settings.
There can be multiple rules defined in each of the places. They will be checked from top to bottom, and the first matching rule “wins”.
The only rule type is currently “Ramp Overlay”, but more types may be introduced in future versions.
Ramp Overlay
The Ramp Overlay rule specifies how a non-music item (e.g. voice track or sweeper) should be moved onto the ramp/intro of a subsequent music item.
When the non-music item is shorter than the ramp, it will be placed onto the ramp by adjusting the Padding of the item.
If it is longer than the (longest) ramp, the Start Next marker of the non-music item is adjusted so that that music starts just in time to reach the end of the ramp at the EOF of the non-music item.
The following configuration settings are available:
- Item conditions: Select the type(s) that the first and second items must match in order to trigger this rule.
- Ducking level: This is the amplification (in negative dB) that will be applied to the music item during the overlay.
- Fade duration: When ducking is applied, the volume is faded out and back in using this duration.
- Placement: When the non-music item (e.g. sweeper) is shorter than the ramp, it can either be placed at the beginning, middle, or end of the ramp, or at a random position somewhere it between.
- Extra margin: Specify an optional margin that should be kept to the end of the ramp. For example, when the ramp is 15 seconds long, and you specify 500ms here, the non-music item is place so that it ends at 14.5s into the song.
- Minimum cue margin: The minimum delay between start of the song and start of the non-music item. This is applied when the non-music item fits entirely into the ramp. This is being used when the non-music item fits entirely onto the ramp, and placement is set to “beginning”.
Triggering Auto Mix
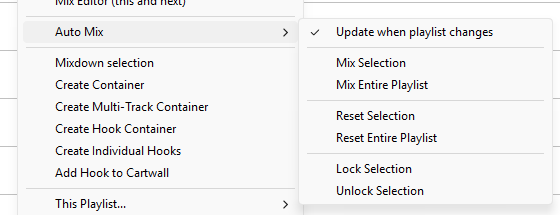
Auto Mix is controlled through the Auto Mix submenu in the right-click menu of the playlist (both the playout and the database playlist):
Automatic triggering
When “Update when playlist changes” is checked, Auto Mix will be triggered whenever you make any change to the playlist (insert, delete or move items). The entire playlist will be scanned, and rules applied as specified.
Manual triggering
Using the commands in the popup menu, you can also manually trigger Auto Mix, in particular:
- Apply rules (mix) the entire playlist, or the selected items only.
- Reset the playlist (or the the selected items), i.e. revert cue information to the backup snapshot.
Locking items
If you want to exclude certain items from being processed by Auto Mix, you can lock them. A lock icon will appear, and the items will be ignored by all Auto Mix operations until you unlock them again.
![]()
Locking items can be useful when you made manual changes to certain items, e.g. created a manual mix in the Mix Editor.